
Step-by-Step Instructions for Using Meta Business Suite and Buffer
So, you’ve planned out all of your multifamily social media posts for the week or month. Now what? Wondering how to schedule social media posts like the pros do?
Remembering to jump online every time you need to publish a post on your multifamily social media is a nightmare. Luckily, there are a couple of different ways you can schedule your posts in advance!

How to Schedule Social Media Posts Using Meta Business Suite
Using your desktop computer, you can easily schedule your content (including videos, Stories, or carousel posts) with Meta Business Suite. It can help you save time and stay organized!
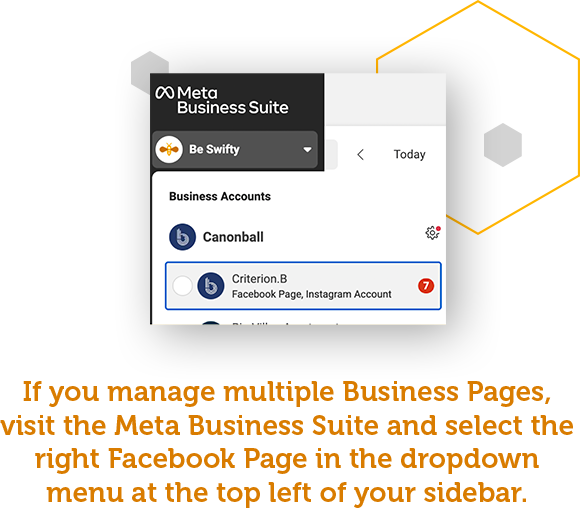
Before you begin, you’ll need to ensure you are an admin of your Facebook Business Page. You’ll also want to ensure you are working with the correct account. If you manage multiple Business Pages, you can visit the Meta Business Suite and select a different Facebook Page in the dropdown menu at the top left of your sidebar.
To create a post in Meta Business Suite, click on “Planner” in the left sidebar menu:
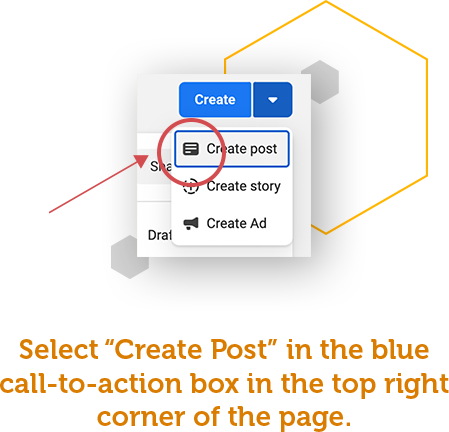
- Select “Create Post” in the page’s blue call-to-action box in the top right corner.
- Select where you want to schedule a post: Facebook Feed, Instagram Feed, or both. You may have to reconnect your Instagram account if this is your first time scheduling a post.
- Enter all of the details of your post, including text, media, and an optional link and location. You can either add a photo, multiple photos, or a video, but you cannot add both a photo and a link preview. Please also note that links will not work on Instagram posts.
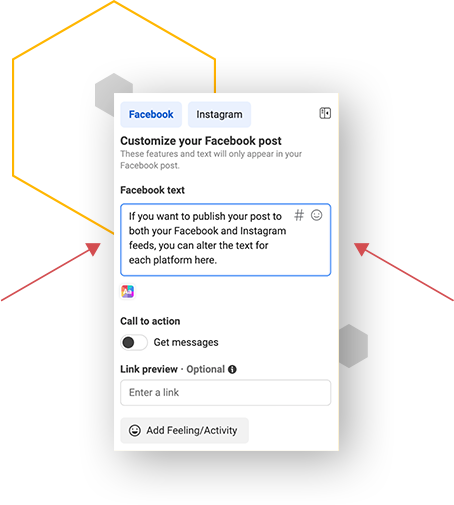
- For Facebook feed-only posts, you can select whether you want to add a call-to-action button to your post to encourage people to message you. You can also select an optional Feeling/Activity to add to your post.
- Preview your post on the right. You can see how it will look on Facebook compared to Instagram or on the desktop compared to the phone.
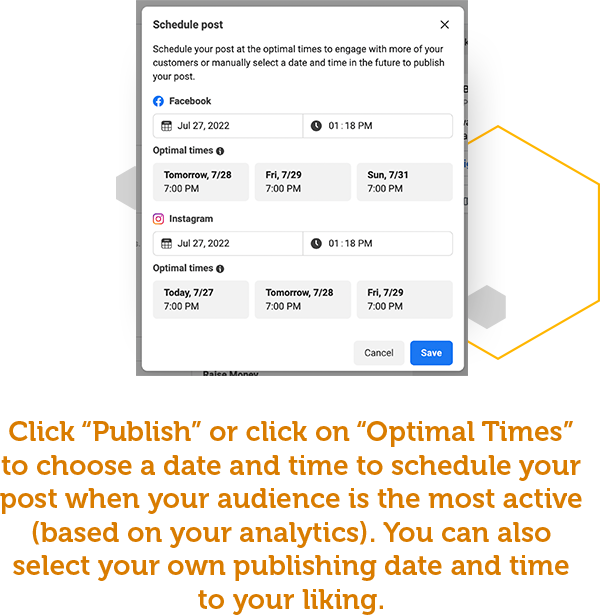
- Click “Publish” to publish right now, or click on “Optimal Times” to choose a date and time to schedule your post when your audience is the most active (based on your analytics). You can also select your publishing date and time to your liking.
- Then, click “Schedule Post.”
How to Schedule Social Media Posts Using Buffer
If the Meta Business Suite isn’t to your liking, you can utilize several other scheduling tools. Some social media tools allow you to publish across all multifamily social media platforms, making it extremely easy to aggregate your posts across multiple channels such as Facebook, Instagram, LinkedIn, and Twitter.
We recommend using Buffer, a free or paid platform for publishing content. The paid version of Buffer allows unlimited users and unlimited accounts in one platform. Meanwhile, the free version is great if you only have a few accounts and one user who will manage the content.
Before you begin, you’ll want to set up your Buffer account and connect all your multifamily social media platforms.
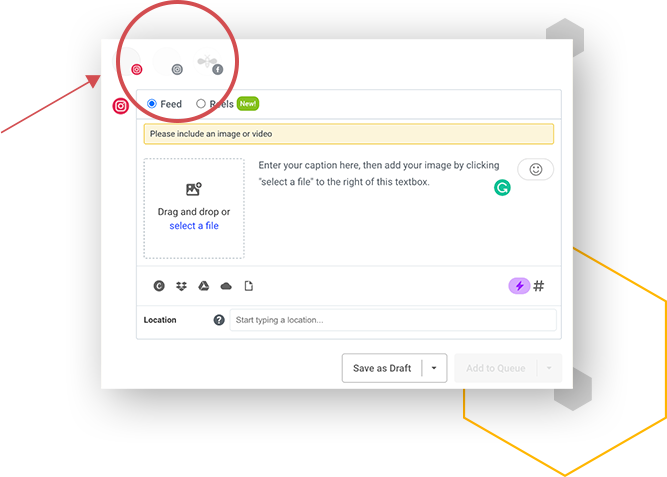
- To get started, click the blue “Create Post” button on the left. This will open up the composer, where you can create your post.
- Next, select the social channels you’d like to include by clicking on the avatars at the top of the composer. You can then customize your post for each social network.
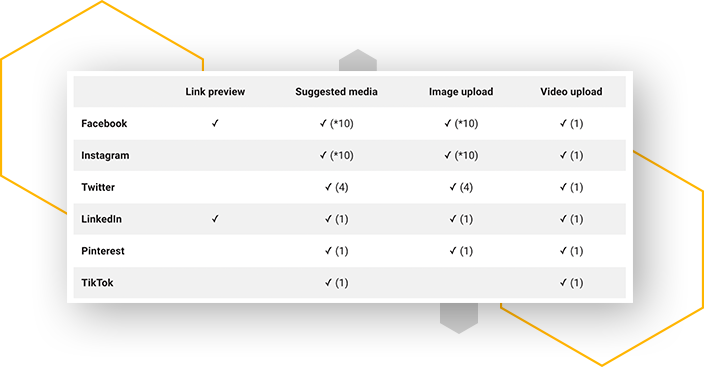
- When adding media to your posts, the options you’ll see will vary depending on the social network. The chart below provides more information.
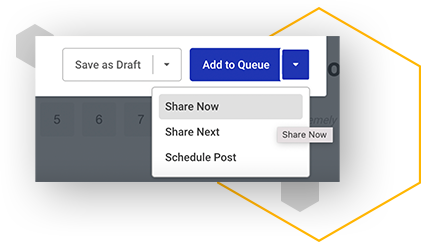
- Once your posts are ready, you’ll have a few scheduling options:
- Add to Queue: Your post(s) will be added to the next available time slots from your posting schedules.
- Share Next: Your posts will be saved at the top of your queues and be the next ones to be published. Other posts in your queues will be bumped down one-time slot. This option is only available on the paid plans.
- Share Now: Your posts will be published immediately.
- Schedule Post: You will be able to choose a custom date and time in the future for the posts to be shared.
If you need more guidance or visual aid, check out this step-by-step guide on scheduling posts using the Buffer platform.
And voila! Scheduling your posts in advance may not take away ALL the pain of multifamily social media management, but it should make your life a little easier. And if you are looking for additional help with your multifamily social media needs, you know who to call (pssst … it’s us!)