
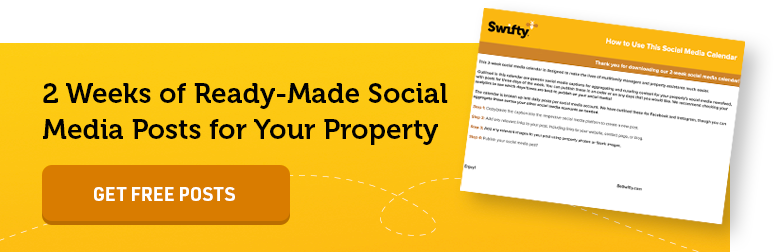
Step-by-Step Guide to Creating a Business Page + Multifamily Marketing Tips
Navigating the vast multifamily marketing landscape can be daunting, especially when it comes to managing social media. But one platform stands out for properties: Facebook.
With its unparalleled reach and user engagement, Facebook marketing offers a unique window to connect with current and potential residents.
Whether you’re taking your first steps onto this platform or brushing up on the basics, here’s a comprehensive guide on setting up a business page and launching a business manager account for your multifamily property.
1. Sign Into Your Personal Account or Create an Account
If you don’t have a personal Facebook account, create one. If you already have one, sign in. Although the business page will be separate, Facebook requires a personal account for verification purposes when creating a business page.
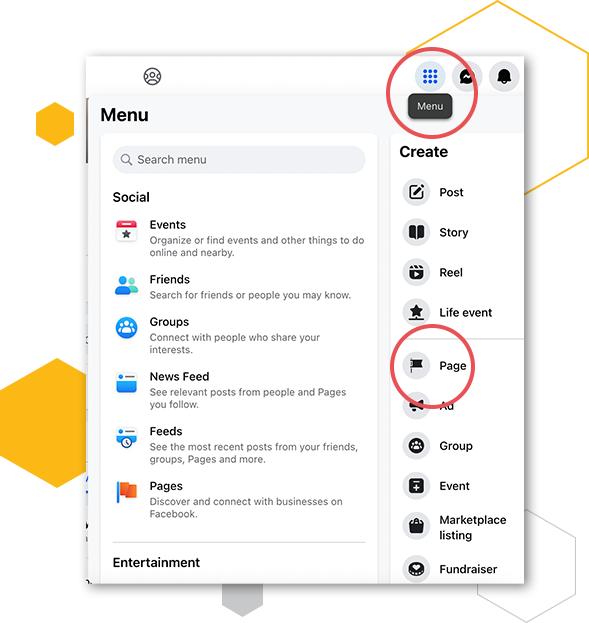
2. Create the Page
On your Facebook dashboard, click on the drop-down arrow in the top right corner. Select “Page.” You will then follow the prompts to create a business page.
3. Fill in Property Details
You’ll be asked to input details like your property name, category (you can type “Real Estate” or “Apartment & Condo Building”), bio, address, and phone number. Be sure to fill in all the available fields with as much detail as possible. Keep in mind that your Facebook business page can often serve as a secondary website for millennials and Gen Z renters.
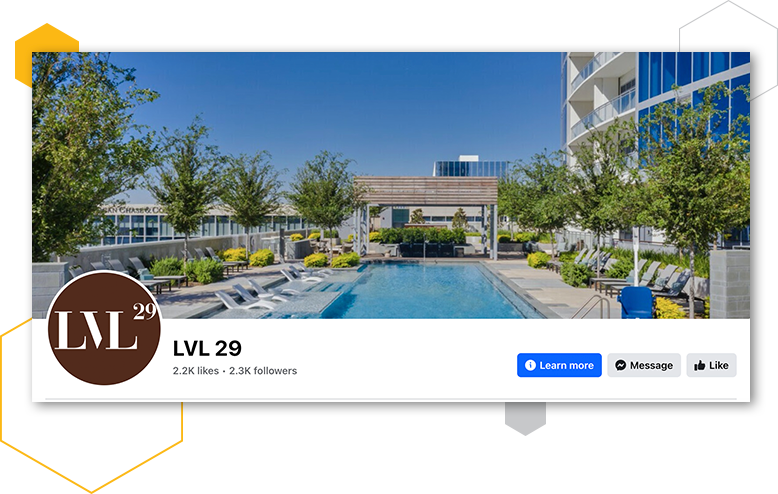
5. Add Visuals
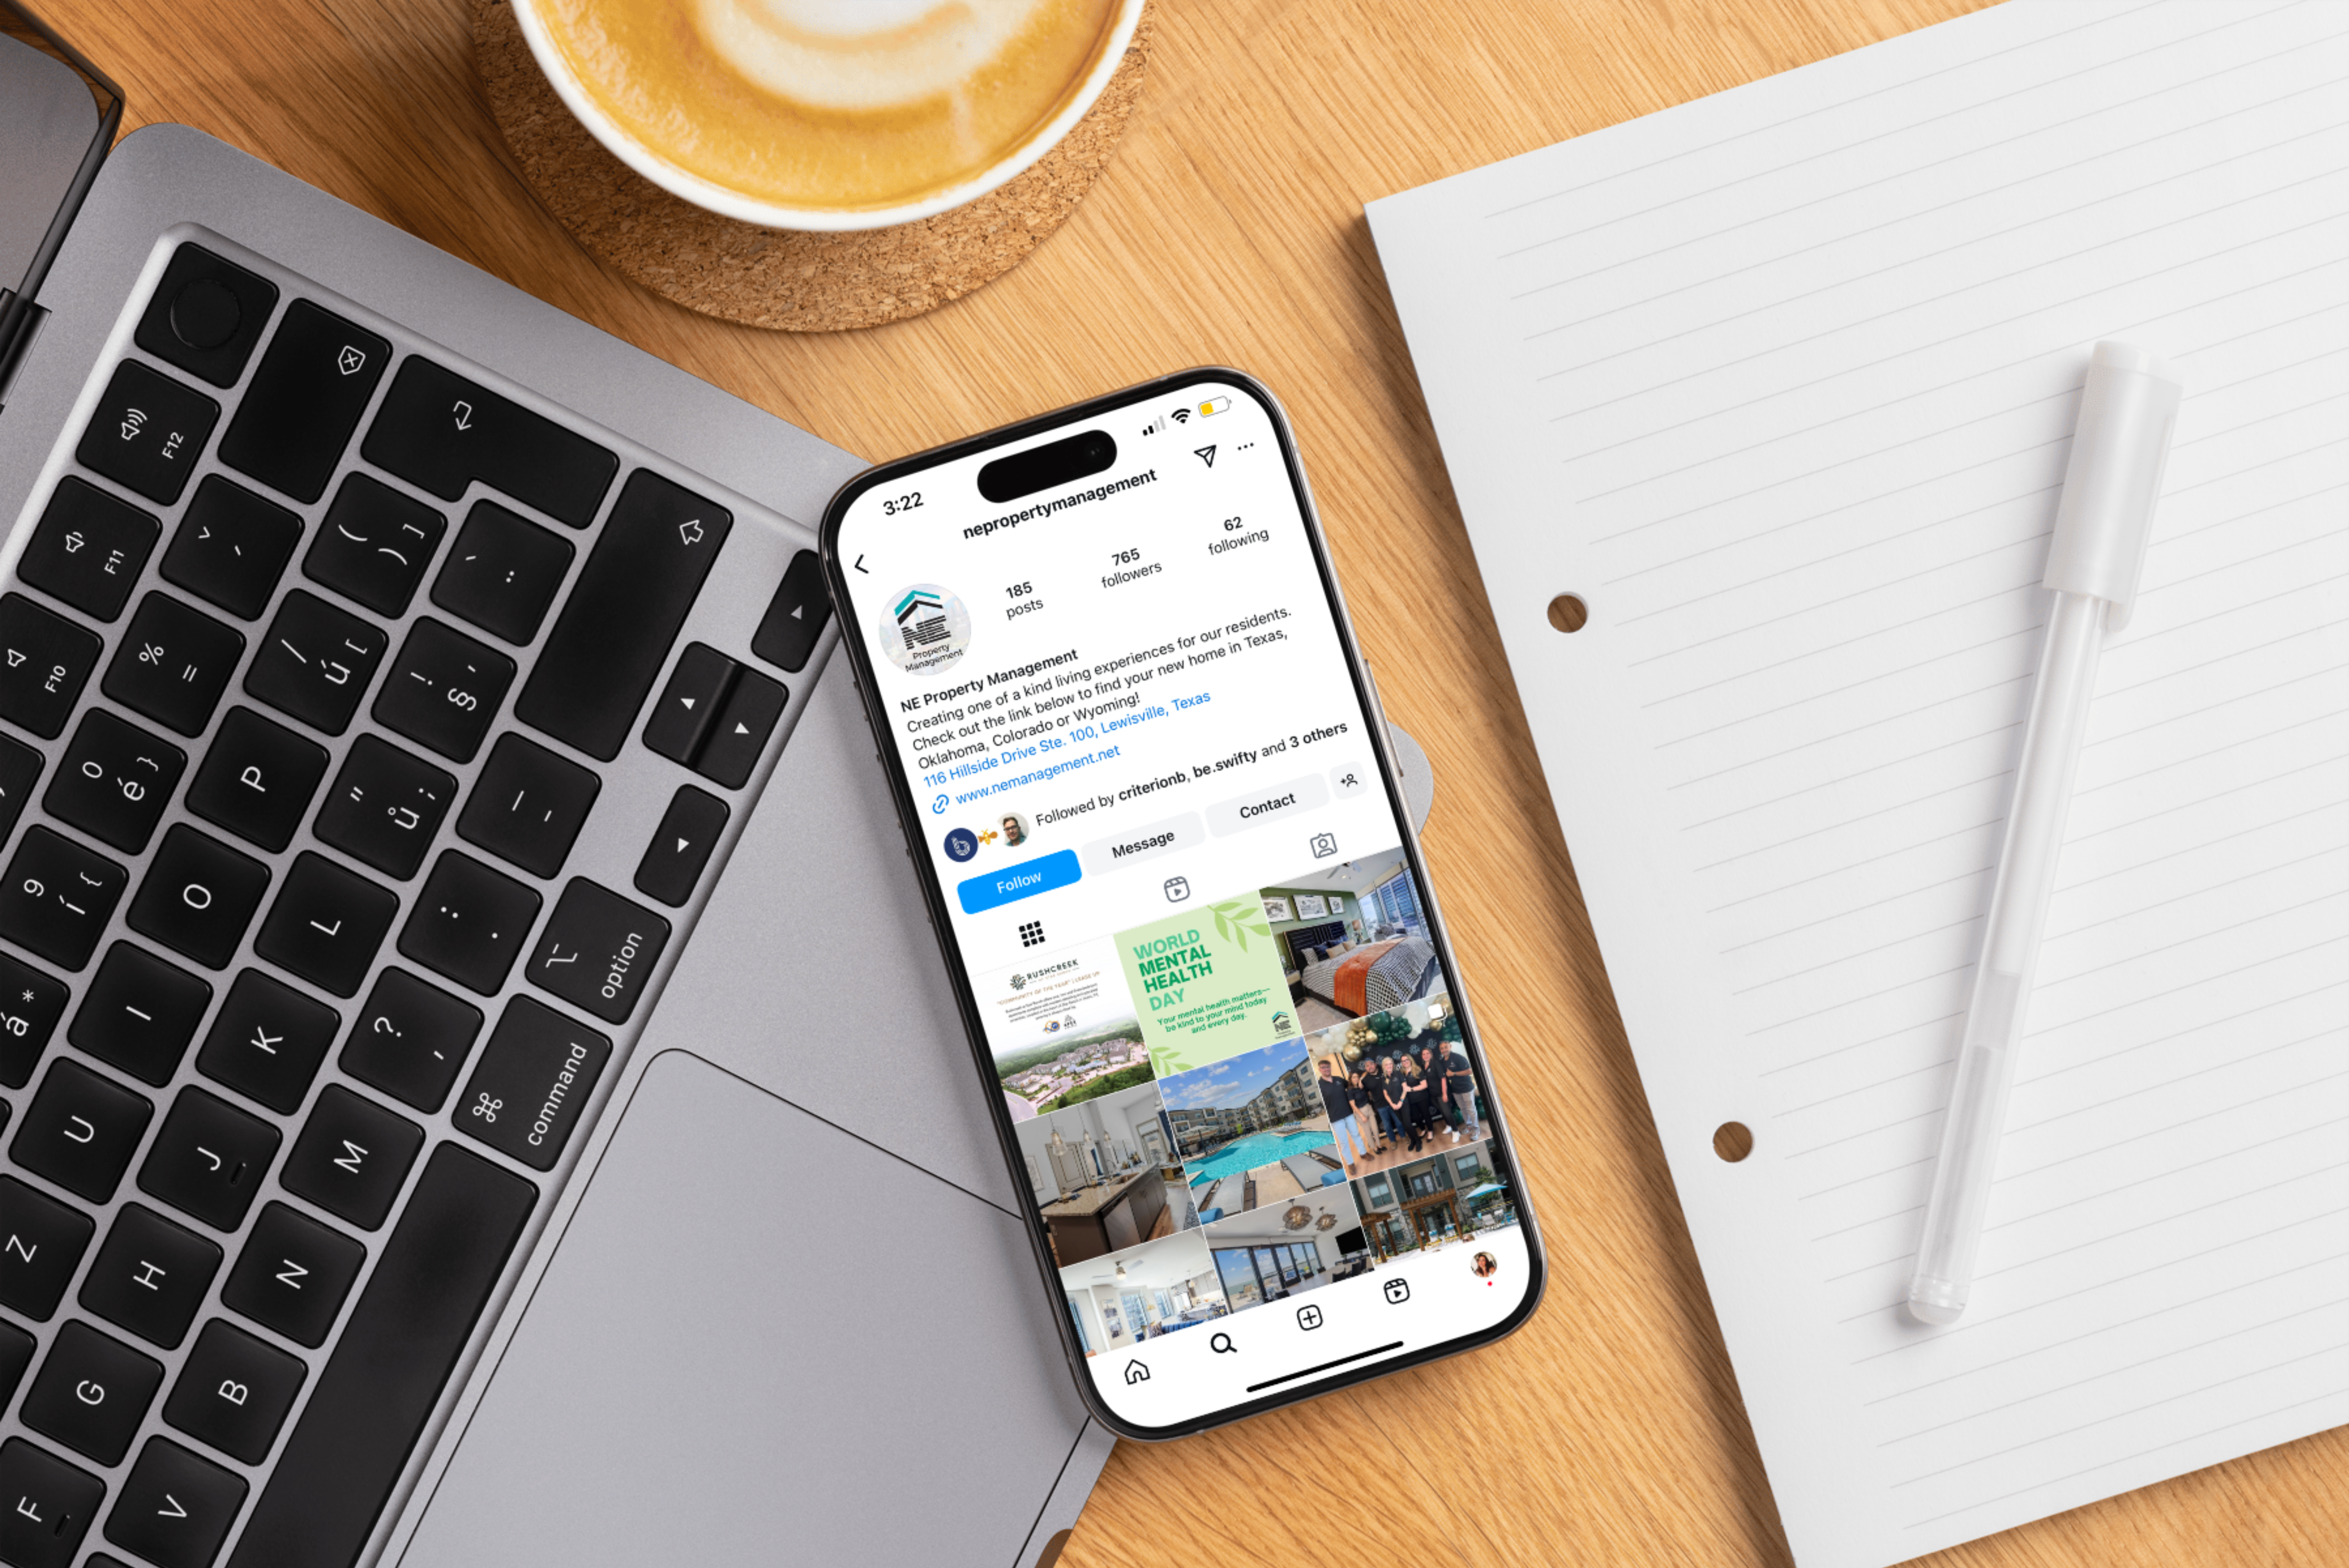
Upload your multifamily branding assets, including your profile picture and cover photo. Ensure the images are high-quality and reflect the essence of your property. We recommend using the apartment logo for the profile image and some high-quality multifamily branding imagery of your property or a video as your cover photo.
Your page’s profile picture is cropped to a circle, and the display dimensions are as follows:
- 176×176 pixels on computers
- 196×196 pixels on smartphones
- 36×36 pixels on most feature phones
Your page’s cover photo is a rectangle, and the display dimensions are as follows:
- Left aligns with a full bleed and a 16:9 aspect ratio.
- Must be at least 400 pixels wide and 150 pixels tall.
- Loads fastest as an sRGB JPG file that’s 851 pixels wide, 315 pixels tall, and less than 100 kilobytes.
- Your profile picture will partially cover the left side of your cover photo and may be cropped and resized to fit different screens.
For profile pictures and cover photos with your logo or text, you may get a better result by using a PNG file. Please see the example below to preview how your page’s cover photo and profile picture may appear together.
6. Customize Your Page
- Username: Create a custom URL (e.g., @RiverViewApartments) to make it easier for people to find your page.
- About Section: Provide a brief description of your property, including unique amenities, the community vibe, or any other essential details.
- Contact Details: Ensure your contact details are up-to-date.
7. Add a Call-to-Action Button
This could be a “Contact Us” button leading to your website’s contact page, a “Learn More” button directing to a virtual tour, or any other relevant action.
8. Add Page Admins
Users can access a business page through “admin access,” which essentially means that a person has been granted permission to manage, post, and edit the content on the page (as well as launch and manage ads). We recommend that at least two internal team members have access; this ensures you never “lose access” to your page if there is turnover. Trust us when we say you do NOT want to go through the steps to regain access to your account when the person who had admin access to it is no longer available.
Check out our other blog for step-by-step instructions and FAQs about how to give Facebook admin access.
9. Start Scheduling Posts
Using your desktop computer, you can easily schedule your content (including videos, Stories, or carousel posts) with Meta Business Suite. It can help you save time and stay organized! Discover how to schedule social media posts in our blog!
Launching a Business Manager for Your Facebook Page
After setting up your page, creating a Facebook Business Manager account is wise. This tool offers robust features for ad management, page analytics, and more.
1. Visit Business Manager Overview
Go to business.facebook.com and click “Create Account.” Use your personal Facebook login to continue.
2. Enter Business Details
You’ll need your business name and description, email, and your property’s physical address.
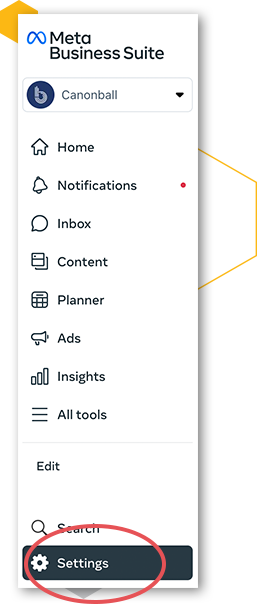
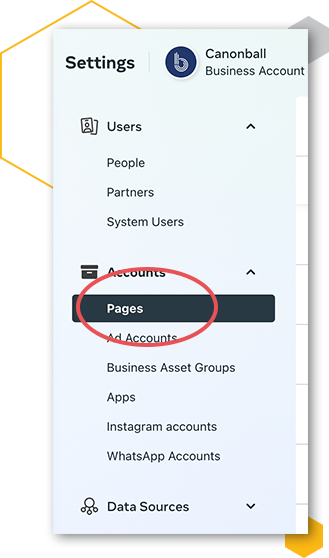
3. Connect Your Business Page
Inside Business Manager, go to “Settings,” then “Pages,” and click on “Add Pages.”

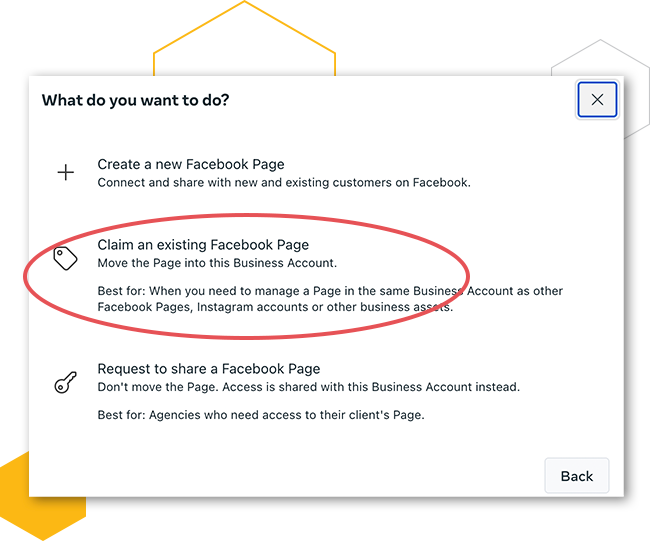
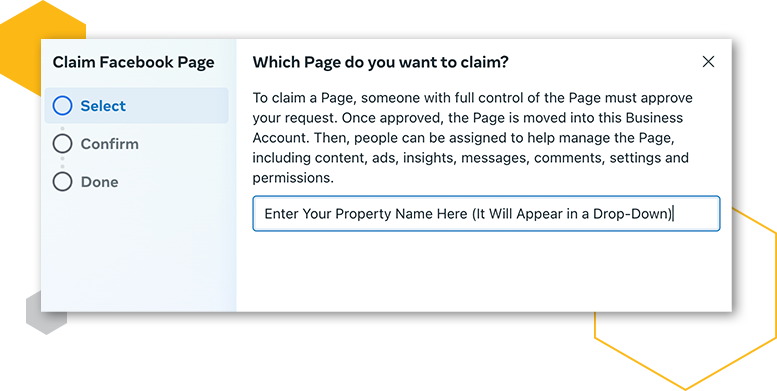
Select “Claim an existing Facebook page” and search for your created page. Your property should appear in the drop-down menu.
4. Set Up Ad Accounts (Optional)
If you’re considering running Facebook ads for your property, this is a good time to set up an ad account within Business Manager.
5. Add Team Members
You can add your team members and assign roles to them. This ensures that the right people have the right access.
Tips for an Effective Multifamily Property Business Page
Launching a business page on Facebook is a significant step, but it’s just the beginning. Simply setting up a page and sporadically posting won’t guarantee results, growth, or those much sought-after leases. For multifamily property managers and marketing teams, it’s imperative to approach this digital platform with intent.
Active posting, genuine interaction, and vigilant analytics monitoring are crucial in turning that virtual page into a vibrant community that resonates with current and potential residents. Here are some tips to ensure your new page thrives:
1. Post Consistent Content
- Diverse Posts: Keep your audience engaged by mixing up your content. Along with updates and blog links, share photos of property amenities, behind-the-scenes glimpses of community events, and spotlights on staff or residents.
- Highlight Success Stories: Resident testimonials can be powerful. Showcase stories of satisfied residents or those who’ve had great experiences with your property to build credibility.
- Promote Events: Hosting a community BBQ, movie night, or workshop? Promote it on your page. This drives attendance and shows potential residents the vibrant community they could be part of.
2. Engage With Your Followers
- Active Interaction: Don’t just respond, initiate. Ask questions, run polls, and create content encouraging users to interact.
- Timely Responses: Addressing comments and messages promptly can make followers feel valued. Quick response times, especially to queries or concerns, can significantly boost your brand’s image.
- Handle Negative Feedback Gracefully: Address negative comments professionally instead of avoiding or deleting them. This showcases your commitment to customer satisfaction.
3. Leverage Facebook Insights
- Analyze and Adapt: Regularly check Facebook Insights to understand what’s working and what’s not. Are videos more engaging than images? Are evening posts more popular than morning ones? Use this data to refine your strategy.
- Study Your Demographics: Knowing your audience’s age, location, and other demographic details can help tailor your content more effectively.
4. Run Ads
- Targeted Advertising: Facebook’s ad platform is incredibly detailed. Craft campaigns that reach potential residents by narrowing down factors like location, age, interests, and more.
- Experiment with Budgeting: Start with a small budget and adjust based on the response. Sometimes a slight increase in ad spend can yield much better results.
- Use Eye-catching Visuals: A captivating image or video can make your ad stand out in a crowded news feed. Ensure the visuals represent the feel and amenities of your property.
Facebook offers multifamily properties an invaluable platform to connect with their community and prospective residents. By setting up a professional business page and leveraging the Business Manager, you can make the most of the opportunities Facebook provides. Happy posting!